Please note this is not a short and sweet description of how to clean a barrel. It covers most issues from the basic to more advanced and informative content and is presented under very clear headings. It is not only about the “how” of cleaning but also about the “why” of cleaning.
The barrel cleaning will also be divide into two stages. A “Pre-Cleaning Stage” that deals with decisions before actual cleaning takes place. A “Physical Cleaning Stage” that deals with the act of cleaning.
Things to consider before cleaning
The first step is to decide if a full cleaning routine is required or not. The natural answer is “always”. There are exceptions to the rule. Hunters are a good example. Most African bush-hunts take place over four to seven days with less than 20 shots fired. Normally cleaning will only be done after the hunt. Precision shooters will always clean a barrel after less than 10 shots. Different competitions have different rules, it may not be possible to clean often. Bisley shooters shoot 50-60 bullets a day without cleaning. Some shoot an entire competition without cleaning.
Try to develop a cleaning interval that is practical, will suit your application and lastly fit in with personal preferences. This may require decisions about bullet coatings and barrel preparation as doing both will greatly extend cleaning intervals. It is also much easier to clean a barrel that was shot with coated bullets.
Another important considerations is to decide how soon after shooting will a barrel be cleaned. Precision shooters prefer to do the cleaning while the barrel is still warm. Most shooters will clean their rifles in the convenience of their homes within a day or so after shooting. Very few hunters take a full cleaning kit with them. A bore snake is probably all they have with them. Therefore the hunting rifle will be cleaned also in the convenience of their home, most likely long after the actual hunt took place.
Modern propellants contain lubricants and rust inhibitors, therefore it is not so important to clean directly after shooting the rifle like in the old days. Do not prolong beyond a few days as there are many environmental factors like humidity that can promote corrosion and it is simply better to store a clean and lubricated barrel. Many a good barrel has been destroyed due to corrosion from a lack of cleaning or due to cleaning solvents that is left in the barrel. It is better to err on the side of caution.
This is quite a technical issue. Here is a simplified list of contributing factors:
- Barrel material, heat treatment, hardness and manufacturing process play a role
- The final interior surface finish from the manufacturer plays a role, smooth is better
- Older barrels tend to foul more than new barrels due to throat erosion amongst others
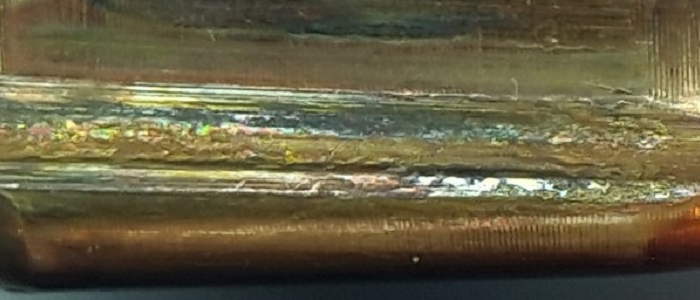
- Pit corrosion, rust damage or mechanical damage
- The width, height and shape of the lands
- The mechanical fit between the bullet and the groove diameter. Quite often barrels for competition rifles (mostly in 308 cal) are ordered tight. Therefore the groove diameter is smaller than the specifications (As much as 4 thou).
- Bullet material, hardness and diameter play a role (See the next paragraph)
There are many factors directly attributable to the bullet type, bullet geometry and bullet material. All three capable to directly impact on the fouling incidence whether it is good or bad. Bullet geometry (bearing surface length) varies from light to heavy bullets for a particular caliber. The longer the bearing surface the more copper will be in contact with the barrel. Manufacturers use different materials/jackets with different hardness’s. Bullet diameters vary from one manufacturer to another. Construction i.e. lead-core, monolithic copper and monolithic brass bullets behave differently in a barrel.
The cleaning routine can be hugely influenced through the use of “Boundary lubricants” lubricants that provide a protective, low friction surface regardless of extreme pressure and elevated temperature. Boundary lubricants are soapy solids deposited into and onto the microstructure of the parent metal with a more than 1 micron coating thickness. Typical examples of such lubricants are graphite, lead oxide, molybdenum disulfide (Moly), tungsten disulfide and boron nitrate. Boundary lubricants such as “Moly” or boron nitrate in powder form are used with great success to coat any copper containing bullets or jackets.
Things to consider with Moly coated bullets:
- Bullets coated with powdered boundary lubricants such as Moly, greatly extend the cleaning interval due to less fouling.
- Less fouling translate into longer barrel life.
- It is also much easier to clean a barrel that was shot with Moly coated bullets.
- Moly buildup inside the barrel is not really the monster that it was made out to be. No harm will come to a barrel that is correctly cleaned. In fact there is ample proof that using Moly coated bullets only, will more than double the life of a new barrel.
- The time required to coat the bullets is much less than the extra time required to clean a copper fouled barrel.
Apply solvent: Liberally apply and soak the brush or patch with solvent.
Push: The act of pushing the cleaning rod through the bore guide into the barrel and out at the opposite end. This is normally a one directional, smooth, medium paced and single stroke right through the barrel.
Work or work-through or stroke: Moving the brush or patch through the barrel with the cleaning rod in short bi-directional but rapid strokes, entering one side and slowly progressing to the opposite side. This stroking, work through or working through the barrel can be done in both directions i.e. from the breach to the crown and back. Always take care not to damage the crown. Some shooters prefer smooth forward movement only without back strokes, but this apply to polished and special competition barrels only. It will simply take too long to clean the average barrel with forward, single direction movement only and there is no proof that bi-directional cleaning strokes negatively impact on accuracy.
Do not damage the crown (barrel exit edge): Any rapid movements past the crown are potentially hazardous. Any object that passes through the crown should do so with great care. Always move a brush slowly through the sharp edge of the crown regardless of the direction of travel. A patch should not be reversed through the sharp edge of the crown. Use slow strokes close to the crown in such a way that no more than a ¼ inch of the patch move past the sharp edge of the crown. If a patch accidentally move too far past the sharp edge of the crown, rather unscrew it and insert at the chamber side again. The body/shank of a brush or jag should be filed smooth so that it can not hook on the crown edge when pulled back into the barrel.
Dry the brush (nylon): It is never a good idea to leave solvent on a brush. Nylon brushes are easy to dry. Hold a rag firmly around the cleaning rod and then pull the brush a couple of times through the tight grip of your hand.
Clean the brush (copper only): Coper brushes are dissolved by the chemicals inside copper solvents. After completion of all the cleaning tasks, always rinse all copper brushes under warm water and shake off the excess. Dab the brush on a rag to remove more water and allow to dry naturally.
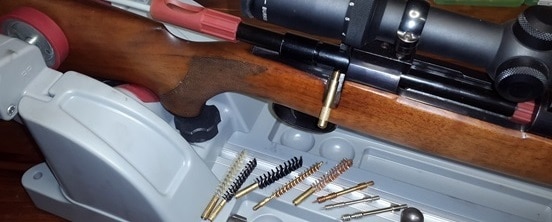
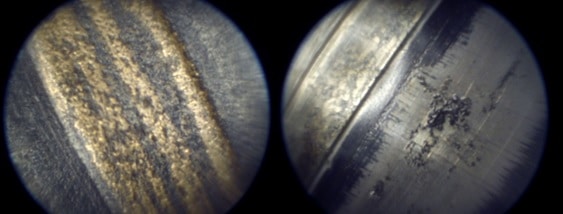
View with a borescope (optional): The borescope comes complete with instructions for assembly and use. Never insert a borescope into a barrel wetted with oil or chemicals. Clean the barrel with successive patches until it is dry on the inside before inserting the scope. Ensure that the rifle is firmly supported, as a borescope is fragile and can easily be damaged while inside the barrel.
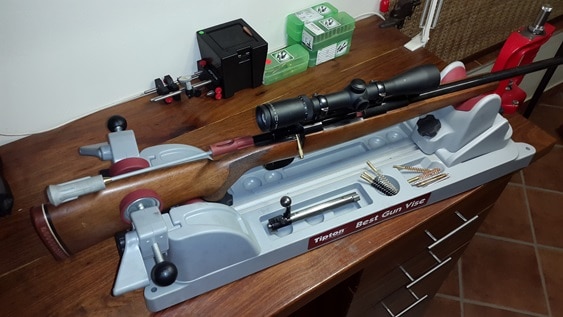
How to clean a rifle barrel
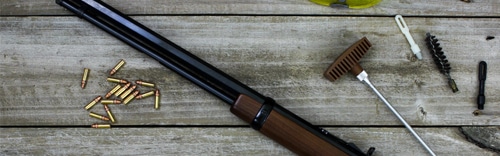
To start with, the following tools will be required:
- Cleaning rod
- Bore Guide
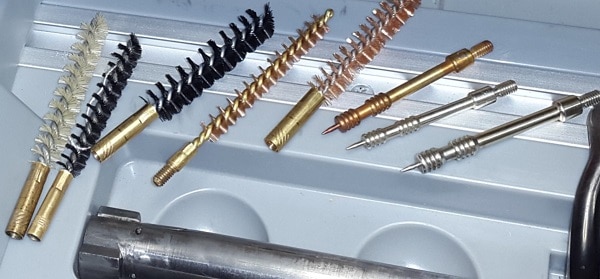
- Copper or nylon brush
- Jag and a collection of white patches
- Alternatively an under sized copper brush with a collection of roll on white patches
- Carbon solvent or Combination carbon/penetrating solvent (Kroil)
- Bore Paste (JB or Iosso)
All carbon solvents need a little bit of time to penetrate and soften carbon deposits. Carbon solvents acts very much like a soap to loosen up the dirt, it will not chemically dissolve the carbon. Mechanical action in the form of rubbing or scratching will improve the solvents ability to soften and lift the carbon. This can be achieved inside the barrel with the tools mentioned above. It is desirable to remove muzzle brakes and silencers before starting with any cleaning routine.
Step 1
Liberally apply carbon solvent to a nylon brush or a patch and push it all the way through the barrel and pull it back again. Apply solvent again and repeat the process. The purpose is to make sure all the internal surfaces are properly wetted with solvent. Allow a few minutes for the solvent to soak into and under the carbon deposits. Experiment with the time required. Normally no more than 5 minutes will be needed for soaking.
Step 2
Apply carbon solvent to the brush again and work it through the barrel with short bi-directional strokes gradually forwards and then gradually backwards no more than 5 complete cycles. Re-apply solvent to the brush between cycles. Allow a few minutes to soak (less than 5 min). During this idle time, use a wetted patch to soak and rub the carbon residue from the flat end of the crown.
Step 3 (Optional but recommended)
Apply carbon solvent to a copper brush and push it 3 to 5 times through the barrel while re-applying solvent in between strokes. The copper brushing can be done in both directions. Remember, no fast movements at the crown and always take great care not to damage the sharp edge of the crown. A copper brush is also an excellent tool to remove molybdenum disulfide (moly) deposits in the barrel. Moly is made up from ultra fine solid particles that can be scraped off the sides of the barrel quite easily. The combined scrubbing of the nylon and copper brushes is the ideal first line of defense to prevent the build-up of moly deposits inside the barrel. Always use a liberal amount of carbon solids with these brushes as the solvents are designed to penetrate beneath and lift solid particles.
Step 4
But a patch on a jag and work it through the barrel in short strokes only once. Replace the soaked patch with a clean one and repeat this process until it comes out clean on the other side. Learn to read the signs of successive patches coming out of the barrel. It is the only way to know what is happening deep inside the barrel if you do not have a borescope. It is a good time to do an inspection with a borescope as the barrel is dry inside.
Step 5
Repeat steps 1 to 4 until there are no more signs of carbon coloration on the path. This is an indication that all the carbon has been removed.
Step 6 (Optional)
This step describe the use of a very fine bore paste as an additional cleaning method. A large number of people are reluctant to use bore paste as it is an abrasive agent. The benefit of using a paste as part of the cleaning routine every now and then can never be under estimated. If the paste is extremely fine the amount of metal removed from the barrel will be negligent and of no consequence while carbon stains and copper residue will be removed to restore a barrels accuracy.
Start with a liberal amount of carbon solvent on a nylon brush and run it once or twice through the barrel. Smear the bore paste handsomely all over a tightly wound patch rolled onto an undersized brush, while ensuring that it is a very tight fit. Work/stroke the the throat and and 4 inches of the barrel 15 to 20 times. This is the area that will benefit most from the grit scrubbing. Withdraw the patch and re-apply a new layer of paste over the old layer. Restart at the throat and work the length of the barrel and back twice. Ensure that no more than a ¼ inch of patch move past the crown edge. While it is important to work that last ¼ inch it is also important not to damage the sharp edge of the crown in any way.
Lightly work the full length of the barrel with a nylon brush, soaked with a generous amount of carbon solvent. Push three clean patches through. Repeat again, first with the brush and then three patches to ensure that absolutely no grit is left behind in the throat or the barrel and that the barrel is dry. Now is a good time to do an inspection with a borescope while the barrel is dry inside.
Step 7
The carbon cleaning process is now completed and proceed to the copper fouling cleaning process. If step 6 (bore paste cleaning) was done then chances are that very little or no copper fouling will be present. Perform a thorough inspection with a borescope on the dry barrel. If no copper fouling or Moly buildup is present proceed to “After cleaning care – Stage 3”. If not, proceed to copper cleaning.
To start with, the following tools will be required:
- Cleaning rod
- Bore Guide
- Nylon brush only
- Non copper Jag and a collection of white patches
Copper removing solvent (Hoppe’s #9, Butch’s, Sweets, Bore Tech)
All copper dissolving solvents need a little bit of time to chemically react with the copper fouling from the surface inwards. Copper solvents actually dissolve the copper inside the barrel and it will come out as a liquid solution with a blue color. Mechanical action in the form of rubbing or introducing fresh solvent to the surface will improve the intensity of the chemical reaction. The copper solvents can be applied to the inside of the barrel with the tools mentioned above.
Step 1
Apply copper solvent to a nylon brush or a patch and push it all the way through the barrel and pull it back again in two smooth actions. Apply solvent again and repeat the process. The purpose is to make sure all the internal surfaces are properly wetted or soaked with solvent. It is best to use a nylon brush for this. Allow some minutes for the solvent to chemically react with the copper fouling. Experiment with the time required. Normally no more than 10 minutes will be needed to reach saturation of the chemical reactants.
Step 2
After saturation fresh chemicals will have to be brought into contact with the remaining copper. Clean all the copper solvent out by pushing one or more clean patches through the barrel. Note the intensity of the blue coloring. Re-apply copper solvent to a nylon brush or patch and repeat step 1 and 2 until no more blue coloring can be detected on a white patch “after” soaking between cycles.
Step 3
Evaluate the cleaning process. If the bore has been cleaned with a bore paste prior to this step chances are that no blue will show up, hence do not be surprised to see no blue stains. Proceed to step 5 if there is no blue stain and return to step 2 if there is a hint of a blue stain present. Now is a good time to do an inspection with a borescope while the barrel is dry inside.
For pitted and rusted barrels the above mentioned process may carry on for ever and can be very frustrating. And then there are some barrels that just foul more. This is a good time to introduce stronger copper removing solvents. As a general rule of thumb the stronger the ammonia smell the stronger the solution will be. It is strongly recommended to have both a mild strong copper solvent as part of the cleaning kit and to know the difference between the two.
Step 4
If no more blue coloring is detected in repeating steps 1 and 2 the copper fouling will be gone. Remove all traces of the copper solvent inside the barrel with successive new and dry patches. Learn to read the signs of successive blue patches coming out of the barrel. It is the only way to know what is happening deep inside the barrel if you do not have a borescope.
Step 5
Liberally apply carbon solvent or penetrating solvent to a brush or patch and work through the barrel in short strokes. Repeat once. The purpose of carbon solvent after copper solvent is to remove all traces of copper solvent from the barrel. Failure to do this may result in corroded and pitted barrels as copper removing solvents are corrosive by nature. Dry the inside of the barrel with successive new and dry patches.
Step 6
Remove the bore guide and clean the barrel chamber. The chamber should be free from solvents as well as lubricants. This is very important. Take care not to allow any chemicals into the trigger or magazine mechanical components.
Step 7
Clean all the brushes. Safely away store all solvents out of harms way.
Related Articles
Introduction to Barrel Care and Cleaning
Good barrel cleaning habits may not be that obvious and can easily be contemplated as a dark art. This is the most important ritual after shooting and the sooner it is done the better. Good barrel care will not only improve you accuracy but it will also greatly improve the life of your barrel.
Barrel Care Part 1: How to know if a barrel is clean
What is a clean Barrel? It is a barrel free from any buildup of foreign material like gun powder residue or copper fouling in the grooves or anywhere on the lands. Every shooter has to know what the condition of the barrel is at any stage.
Barrel Care Part 2: What equipment to use for barrel cleaning
Setting up a proper cleaning kit can be costly. Some of the equipment is convenient and while others are essential. Settling on the right combination is largely a matter of personal preference. In this section all equipment will be discussed as well as their merits.
Barrel Care Part 3: How to clean a barrel
Developing the correct cleaning routine is a lot about common sense and a little about tradition. Due to many recent technological advancements and a huge variety of clean burning powders available today it will be wise to adopt modern gun cleaning practices.
Barrel Care Part 4: How to prepare a barrel before shooting
This section is all about the different techniques that can be used to provide a good form of dry lubrication prior to the first shot. First shot lubrication will also help to get on the button and consistent shot placement from a cold, recently cleaned barrel.